![LottoShield Logo -2.png]](https://help.lottoshield.com/hs-fs/hubfs/LottoShield%20Logo%20-2.png?height=50&name=LottoShield%20Logo%20-2.png)
⚠️ Note: Setting up a BackOffice connection can be tricky depending on your store layout. If this process feels overwhelming, we highly recommend involving an IT technician to assist with BackOffice setup.
✅ What You’ll Need Before Starting
Make sure you have the following equipment before beginning:
| Item | Notes |
|---|---|
| Windows PC or Laptop | Must have an Ethernet port or a USB slot (for adapter). |
| USB-to-Ethernet Adapter | Buy Here – Required if your device lacks a built-in Ethernet port. |
| 5-Port Network Switch | Buy Here – Only needed if the BackOffice port is already in use. |
| Ethernet Cable (Cat5 or Cat6) | Long enough to reach the Paysafe box. |
🔌 Step 1: Plug in Your Ethernet Cable
-
Locate the Ethernet port on your PC.
If your device lacks one, connect a USB-to-Ethernet adapter and plug your Ethernet cable into it. -
Plug the other end of the Ethernet cable into the Paysafe UTM box:
-
Use Port 1 for Cradlepoint models
-

-
Use Port 9 for Meraki models

If you want to make sure which port is correct for you box call or use PaySafe chat support
-
📞 (800) 393-3246
🟡 If the BackOffice Port is Occupied
If another device is already using the back office port:
-
Unplug the existing Ethernet cable from the back office port (Port 1 PDI Cradlepoint and port 9 Meraki).
-
Plug a Network Switch into that port.
-
Connect the original cable and your new PC Ethernet cable into the switch.
💻 Step 2: (Optional) Add Persistent Route for Dual NICs
This is only required if your PC uses both Wi-Fi and Ethernet (or has two LAN connections).
-
Open your Start Menu, type
cmd, right-click Command Prompt, and select Run as Administrator.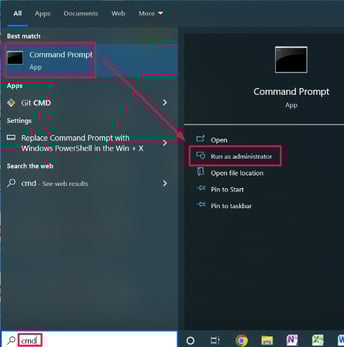
-
In the command prompt, type:
ipconfig
Press Enter, then find the Default Gateway under your active Ethernet connection.
The image above is an example: The default gateway which you need to locate on your own PC is what you would enter in the command below. You must enter the Default gateway IP for the Wired Ethernet not Wireless.
Based on Your POS Type, Enter the Route Command
For Verifone POS:
route add -p 192.168.31.11 MASK 255.255.255.0 [Gateway IP]
For Gilbarco POS:
route add -p 10.5.48.2 MASK 255.255.255.0 [Gateway IP]

Replace
[Gateway IP]with the one fromipconfig.
- Press Enter to run the command.
- Return to Change adapter settings.
Right-click the PaySafe connection → Disable
Then right-click again → Enable
This refreshes the route.
✅ Step 3: Test the Register Connection
For Verifone POS:
-
Open a browser and go to:
https://192.168.31.11/ConfigClient.html -
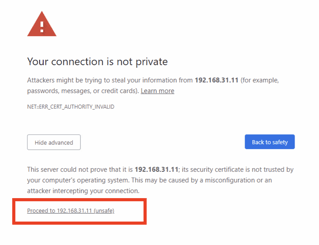
If prompted that the connection is not private, click Advanced → Proceed.
You should now see the Petroleum C-Store Control Center.

Now it’s time to configure your Verifone POS!
For Gilbarco POS:
-
Open File Explorer on your PC.
-
In the Quick Access bar, type:
\\10.5.48.2Press Enter.
-
Enter credentials if prompted:
- Username:
BackOffice - Password:
BackOffice
Capitalization matters: both B and O must be uppercase.
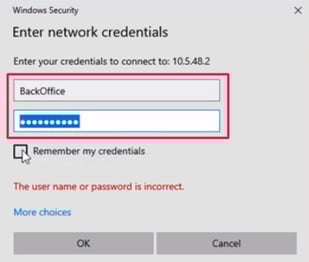
You may also want to click Remember my credentials to save you time later. When you’re done click OK.
In the new window, you should see the XML Gateway folder.

Now it’s time to configure your Gilbarco Passport POS!
If you hit any roadblocks, use LottoShield Live Chat Support—we’re here to help you every step of the way.